 Save
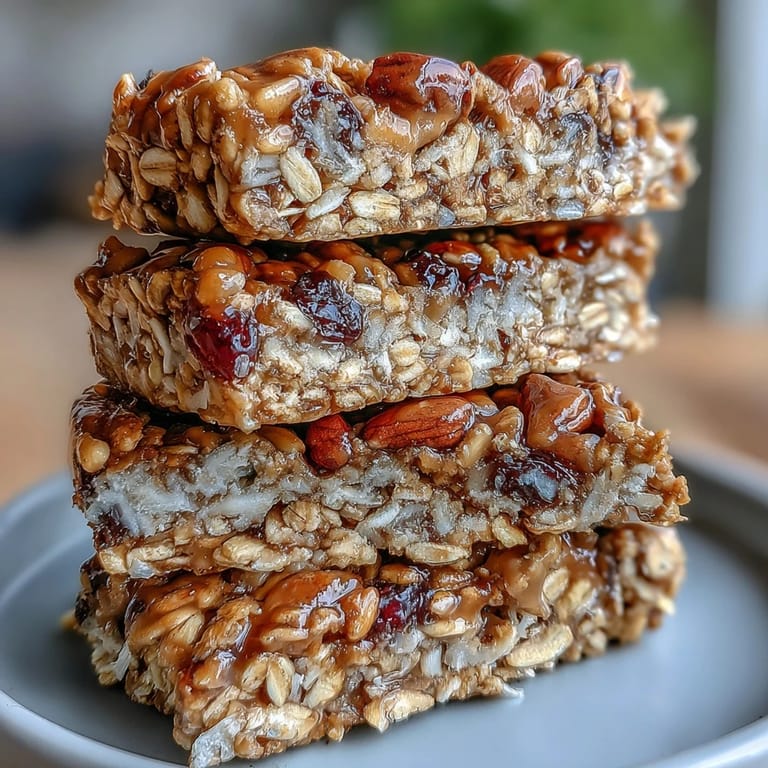
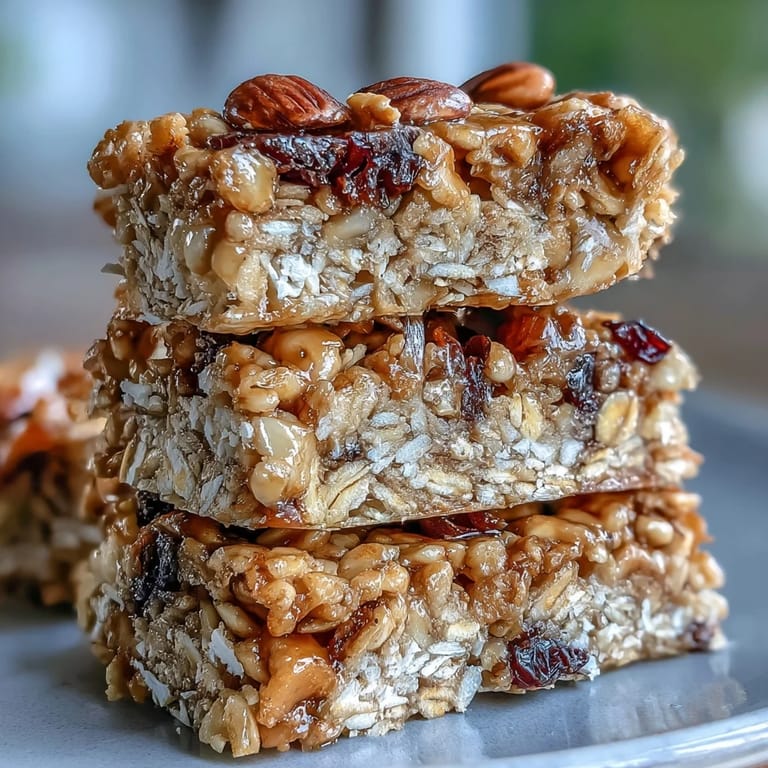
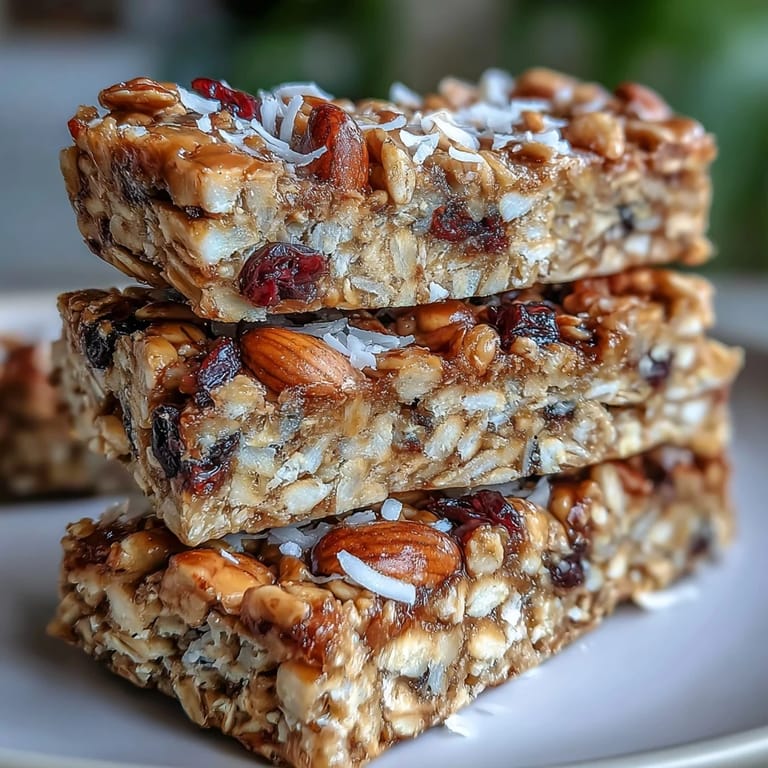
Save The first time I made these nut-free granola bars, it was mostly because I couldn't find anything suitable for my friend's kids with allergies. The kitchen was filled with the aroma of warm honey and toasted oats, and even my little niece, who usually ignores homemade snacks, came to peek at what was baking. I remember squeezing the slab tighter in the pan, determined to avoid the crumbly mess from last time. It's funny how a simple snack can turn a quiet afternoon into a mini production, complete with sticky fingers and laughter. These bars quickly transformed from a necessity into my reliable go-to for last-minute treats.
I once made a double batch for a group beach picnic; everyone kept coming back for seconds, and even the adults were surprised they were nut-free. I ended up doling out the recipe by scribbling it on napkins and watching chocolate-smudged smiles. There&39;s an undeniable joy in seeing a snack you made get passed around and devoured, especially when you know no one has to worry about hidden allergens. It was one of those days where I mostly watched and enjoyed the chat, the bars disappearing one by one. It still feels good knowing they&39;ve become part of such sunny days.
Ingredients
- Old-fashioned rolled oats: I recommend using thick-cut oats for extra chewiness; gently toast them for a deeper, nutty flavor without actual nuts.
- Unsweetened shredded coconut: Adds lovely texture and subtle sweetness; watch for hidden sugar in some brands.
- Pumpkin seeds (pepitas): Easily swap in other seeds if needed, but pepitas give a crunchy heartiness that feels substantial.
- Sunflower seeds: Provides crunch and helps with binding; always check for freshness as stale seeds ruin the batch.
- Dried cranberries or raisins: Chop them to help distribute flavor—cranberries add tartness, raisins bring mellow sweetness.
- Mini chocolate chips (optional): Use dairy-free if needed, and fold them in after mixing so they don&39;t melt away.
- Fine sea salt: A little salt balances the sweet and deepens every bite; don&39;t skip it.
- Ground cinnamon: Just a hint lifts the aroma and coziness; adjust for taste but too much can overpower.
- Honey: Gives a chewy stickiness and gentle sweetness—maple syrup works too.
- Sunflower seed butter or tahini: These keep bars nut-free and rich; sunflower seed butter is a little sweeter, tahini adds an earthy edge.
- Coconut oil, melted: Make sure it&39;s well melted so everything blends smoothly; this helps keep bars solid and moist.
- Pure vanilla extract: Rounds out flavors—don&39;t forget to stir it in with the wet ingredients.
Tired of Takeout? 🥡
Get 10 meals you can make faster than delivery arrives. Seriously.
One email. No spam. Unsubscribe anytime.
Instructions
- Prepare the pan:
- Line your baking pan with parchment, letting it hang over the sides for easy removal. Every time I skip the overhang, I regret the sticky mess—trust me, this is lifesaving.
- Mix dry ingredients:
- Combine oats, coconut, seeds, dried fruit, chocolate chips, salt, and cinnamon in your biggest bowl—you&39;ll want room to stir. The colors and smells blend into something that feels like breakfast and dessert all at once.
- Warm wet ingredients:
- In a small saucepan, stir honey, sunflower seed butter or tahini, melted coconut oil, and vanilla over low heat until smooth and runny. It should smell sweet and toasty, and as soon as it&39;s cohesive, take it off the heat to avoid burning.
- Combine and mix:
- Pour the warmed wet mixture into the bowl of dry, and mix thoroughly with a sturdy spatula. I always scoop from the bottom to catch stray oats and make sure nothing is left behind; you&39;ll notice the mixture starts sticking together like magic.
- Press and shape:
- Spoon everything into the pan, pressing down firmly; I use the bottom of a measuring cup to really compact the mixture. Pay attention to the corners—they&39;ll set nicely if packed well.
- Bake and cool:
- Bake until the edges are golden brown, about 20-25 minutes. Let the bars cool completely in the pan on a wire rack before lifting them out—rushing this step means crumbly bars, so patience pays off.
- Cut and store:
- Lift the bars out with the parchment overhang, slice into twelve neat rectangles. Store in an airtight container at room temperature or pop them into the fridge for extra longevity.
 Save
Save One rainy afternoon, I surprised my neighbor&39;s daughter when I dropped off a batch for her nut-free classroom “snack day.” She got a little shy smile, and her mom texted, saying the bars had been requested again for next week. That feeling—knowing you made something safe and delicious—always leaves a quiet satisfaction. It turned from just another recipe into part of their family routine. Sometimes food can feel like a gentle reassurance, especially for little ones with allergies.
Swapping Ingredients Fearlessly
Experimenting with the add-ins is half the fun. I&39;ve tossed in dried apricots, swapped pepitas for chia seeds, and even added chopped dates for an extra gooey bite. As long as you keep the ratios balanced and stick to nut-free binders, the bars always turn out just right. Don&39;t be afraid to adapt them to suit your pantry or to sneak in what&39;s lingering in the cupboards.
How to Get the Perfect Chew
Compressing the mixture firmly is what locks in the chewy texture. Some days I use a flat-bottomed glass, and the sound of it pressing down reminds me I&39;m building something sturdy. The bake time is flexible—if you like softer bars, pull them out at 20 minutes. The edges should look golden, but the center stays just a bit soft. If you wait for a full crisp, you&39;ll get more of a cookie than a bar.
Making Them Last: Storage & Sharing
Granola bars left at room temperature will stay soft for about a week, but refrigerating keeps them from getting sticky on hot days. I often wrap them individually for school lunches or road trips, where they&39;re always popular. Sharing them around feels like a small act of kindness, especially knowing they&39;re safe and homemade.
- Wrap bars in wax paper for easy grab-and-go snacks.
- Use freezer bags to save them for the month.
- Always note allergens if gifting to others.
 Save
Save These granola bars are my trusty answer to snack dilemmas—never fussy, always reliable. Enjoy making them your own with your favorite seed and fruit combinations.
Recipe FAQs
- → How do I keep granola bars chewy?
Mix wet ingredients thoroughly and avoid overbaking. Cool completely before slicing for optimal chewiness.
- → Can I use different seeds or dried fruit?
Yes, swap in any preferred seeds or dried fruit to customize flavor and texture. Try apricots or chia for variety.
- → What alternatives work for honey?
Maple syrup or agave nectar offer vegan-friendly options, still providing the needed stickiness and sweetness.
- → Is coconut oil essential?
Coconut oil helps bind the bars, but melted butter or another mild oil can be used if you prefer.
- → How should I store these bars?
Keep bars in an airtight container at room temperature for up to a week, or refrigerate for longer lasting freshness.
- → Are these bars suitable for nut allergies?
Yes, bars are made without nuts, but check coconut and seed ingredient labels for possible cross-contamination.