 Save
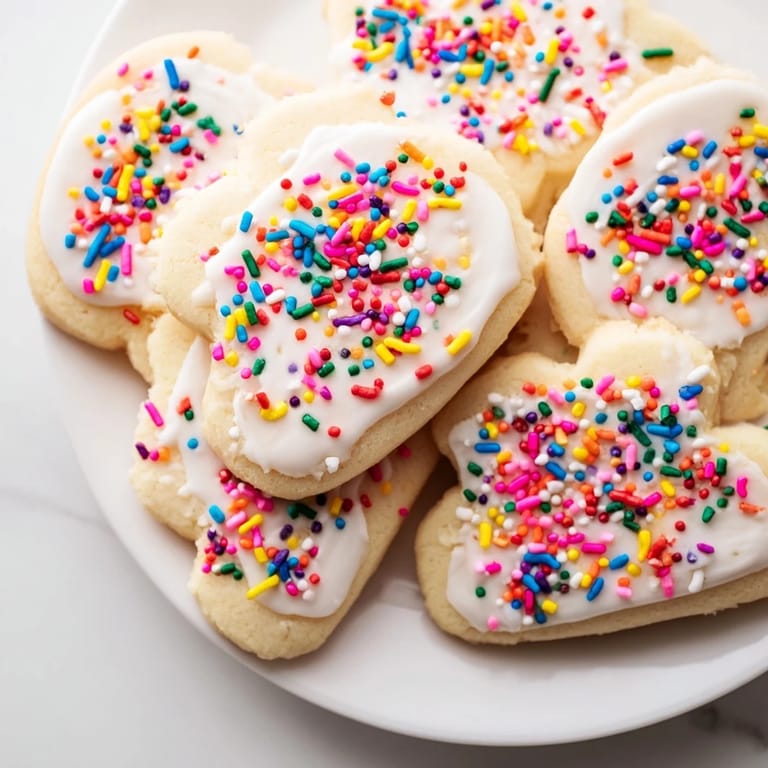
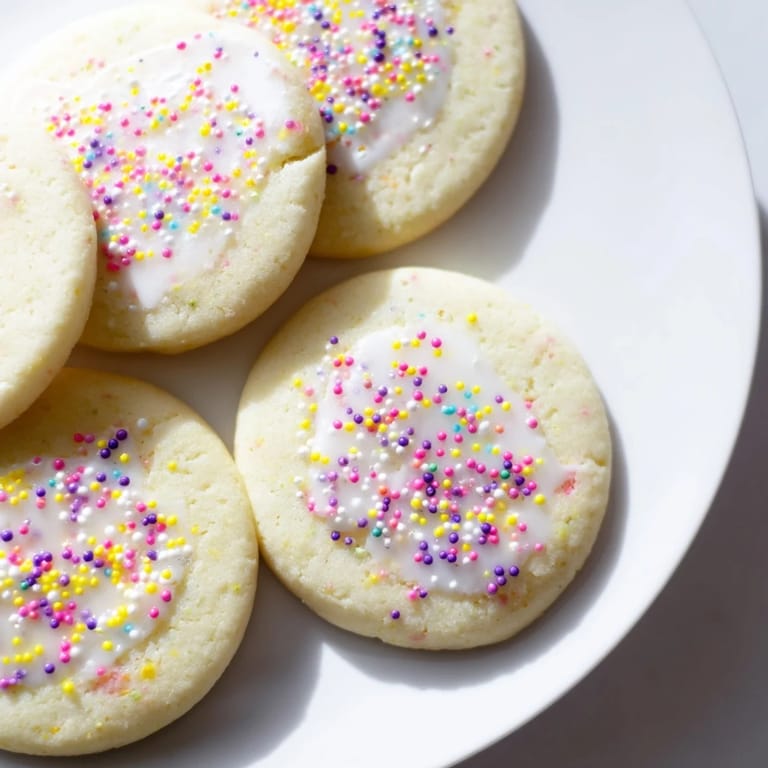
Save There's something about December that makes me pull out my mixer and start creaming butter and sugar together, almost on autopilot. My sister used to call these "blank canvas cookies" because they were the only ones we could decorate without tasting the dough halfway through—though I'll admit I never fully succeeded at that restraint. These sugar cookies have that perfect tender crumb that practically melts on your tongue, and they're sturdy enough to hold whatever designs you dream up.
I remember setting up a cookie decorating station with my nephew one snowy afternoon, and he kept asking why his icing wouldn't stick to some cookies but slid right off others. That's when I realized how much difference a little cooling time makes—warm cookies and icing simply don't cooperate.
Ingredients
- Unsalted butter, softened: Use room-temperature butter so it creams smoothly without chunks, which aerates the dough and gives you that tender texture.
- Granulated sugar: This is what creates the structure and slight crispness at the edges while keeping the interior soft.
- Large egg: Just one egg binds everything together without making the dough sticky or dense.
- Pure vanilla extract: The real deal matters here since it's one of the few flavors competing for attention.
- All-purpose flour: The backbone of the cookie; don't sift obsessively, just spoon and level for consistency.
- Baking powder: A modest amount helps them rise gently and stay tender rather than cakey.
- Salt: Even a pinch makes the vanilla pop and balances the sweetness.
Tired of Takeout? 🥡
Get 10 meals you can make faster than delivery arrives. Seriously.
One email. No spam. Unsubscribe anytime.
Instructions
- Cream the butter and sugar:
- Beat them together for 2 to 3 minutes until the mixture looks pale and fluffy, like you're incorporating air with every stroke. You'll know it's ready when you can barely see streaks of butter.
- Add the egg and vanilla:
- Drop them in and beat until the mixture looks smooth and combined, no visible egg streaks remaining.
- Combine the dry ingredients:
- In a separate bowl, whisk the flour, baking powder, and salt together so the leavening distributes evenly throughout.
- Bring it together:
- Pour the dry mixture into the wet mixture and stir just until no flour streaks show—overmixing develops gluten and toughens the cookies.
- Chill the dough:
- Divide into two disks, wrap in plastic, and refrigerate for at least an hour so the dough becomes easier to roll and the flavors deepen.
- Roll and cut:
- On a lightly floured surface, roll one disk to about ¼-inch thickness and cut shapes with cookie cutters, leaving about an inch between each one on your baking sheet.
- Bake until just set:
- Watch for the moment when edges turn pale golden but the centers still look slightly underdone—this takes 8 to 10 minutes and makes all the difference in tenderness.
- Cool properly:
- Let them rest on the baking sheet for 5 minutes so they firm up enough to move, then transfer to a wire rack to cool completely before decorating.
 Save
Save I'll never forget the year my mother had me frost dozens of these cookies for a neighborhood cookie exchange, and I finally understood why she always made them first. They were the canvas that made every other baker's work look even more spectacular.
The Art of Getting the Texture Right
These cookies live in a sweet spot between tender and structured, and it all comes down to timing. Pull them from the oven the moment the edges turn golden and the centers still look slightly pale—that's when they're actually perfect. They'll continue cooking on the hot pan for those first five minutes, and by the time they reach the cooling rack, they'll have set into exactly the right crumb. Bake them a full minute longer and you've crossed over into crunchy territory, which is fine if that's your preference, but you'll lose that signature melt-on-your-tongue quality that makes these so special.
Why Chill Time Matters
The dough disk sitting in your refrigerator isn't just resting—it's absorbing flavors and becoming more cooperative. Cold dough rolls out cleaner, doesn't stick to your work surface, and holds its shape better in the oven. I learned this the hard way one impatient afternoon when I skipped chilling and watched my carefully cut snowflakes turn into oblong blobs halfway through baking. Now I actually plan ahead, sometimes even making the dough the night before so I can roll and bake on my own schedule.
Decorating and Flavor Twists
The beauty of these cookies is their neutrality—they're equally happy with a simple sprinkle of colored sugar or an elaborate royal icing masterpiece. If you want to push beyond plain vanilla, try stirring half a teaspoon of almond extract into the wet ingredients or grating fresh lemon zest into the dough for a subtle brightness. The base recipe is sturdy enough to handle these additions without losing its tender character, and each variation tells a slightly different story.
- Make your dough up to three days ahead and store it wrapped in the refrigerator, or freeze it for up to two months if you want cookies on demand.
- Don't stress about perfect shapes—imperfect cookies taste just as good and often charm people more than the flawless ones.
- Room-temperature butter is non-negotiable, so set yours out while you gather your other ingredients.
 Save
Save These cookies have a way of turning ordinary moments into something worth remembering. Whether you're decorating them with someone you love or simply enjoying the ritual of baking, they're there to make it sweeter.
Recipe FAQs
- → How can I achieve a tender, buttery texture?
Creaming softened butter and sugar until light and fluffy creates air pockets that help result in a tender crumb.
- → What’s the purpose of chilling the dough?
Chilling firms the dough, making it easier to roll and shape, while preventing excessive spreading during baking.
- → How do I prevent cookies from becoming too hard?
Bake until edges just start to turn golden; overbaking leads to crisp, harder cookies. Cooling time also affects texture.
- → Can I add flavor variations?
Yes, almond extract or lemon zest can be added to enhance flavor and provide a subtle twist on the classic taste.
- → What tools are recommended for shaping and decorating?
Use a rolling pin for even thickness, cookie cutters for shapes, and icing or colored sugars for decoration.
- → How should I store leftover baked cookies?
Store in an airtight container at room temperature to maintain freshness for several days. For longer storage, freezing is an option.